- HubPages»
- Technology»
- Computers & Software»
- Computer Science & Programming»
- Computer Programming Tutorials
ECLIPSE IDE Tutorials - Creating add() and remove() Methods For Objects in Lists

In the Preceding Tutorial.......
In the preceding tutorial, "ECLIPSE IDE Tutorial - Creating A Resource Class Composed of Object Lists", the constructor class was created for the two list resources we will be relying on in our car rental agency example. We created two new lists, the car list and the billing address list. Our test method assertTrue() introduced a method which returns a value of true or false using the instanceof operator.
Sever tips were added as to how ECLIPSE helps in the development process through the use of color and editor window flags.
A short discussion of the differences between JUnit 3 and JUnit 4 was also included.
Focus of ThisTutorial
This tutorial will focus on the creation of two basic methods which will allow the addition and removal of items from the lists. Test cases will be created. The benefit of Java generic coding will be demonstrated.
Automatically Generating "getter" Method
Starting from the source ("src'" folder) we will want to have methods avaialble for getting objects. ECLIPSE as you are aware of at this point has an automatic way of generating these methods. Starting from the toolbar select Source>Generate Getters and Setters... . For our purposes we do not need the "setter" method, we just need the "getter" methods.The chck boxes are clicked for name, BillingAddress, and Car. Once selected we click OK and the "stub code for these methods is added to our resource source file as illustrated in the snapshots which follow.
Selecting the "getter" Methods and the Resulting Code


An ECLIPSE Helpful Hint
When code changes are made (even when those code changes are suggested by ECLIPSE) is it always a good idea to test the new code. At the conclusion of the last tutorial our test case with the new constructor added ran successfully. Running the test case after the generation of the "getters" is a good idea.
Adding a Method to Populate the LIists
In order to test the add and remove methods, the lists should have some list items in it. To avoid code duplication later on we will add a new methods. We will need some cars and billing addresses defined as well as an object which identifies our resources.
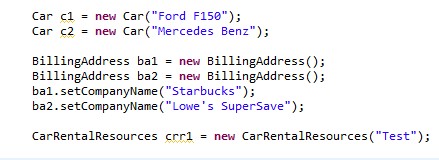
In this example we create a method called populateArrays() to add these objects.
First, we create two car objects:
Car c1 = new Car("Ford F150");
Car c2 = new Car("Mercedes Benz");
and two billing address objects:
BillingAddess ba1= new BillingAddress();
BillingAddess ba2 = new BillingAddress();
Since BillingAddress was created without arguments we need to set values for the company name field:
ba1.setCompanyName("Starbucks");
ba2.setCompanyName("Lowe's SuperSave");
and to indicate that these are test resources we add giving the object the name :
CarRentalResources crr1 = new CarRentalResources("Test");
In the following, the use of color indicates that we have a problem. The black text indicates that the fields created have been created as local fields. ECLIPSE has a way of correcting this which we will see next.
Oh no! A Problem the Fields Are Local Variables
Correcting the Problem Using JAVA Code Refactoring
In the tutorials presented thus far we have not had an occasion to touch on the subject of "refactoring". Not only that but this may seem like a strange word which even experienced developers may not have encountered.
So what is refactoring?
Refactoring is a method of restructuring computer code, changing the factoring, to make it more usable or extensible.". One of the types of code refoactoring which we will next demonstrate is to create a more generalized type, to allow for greater code sharing. Which seems to be our need. For the defined fields to be useful they must be available to other methods in the class.
How do we do this?
Highlight the statements referring to a car. Select Refactor from the tool bar and follow with option Convert Local Variable to Field. A popup window appears with a number of options. Choose the radio buttom for public, then click on OK. When the source window is refreshed you see the code has changed. Now repeat the process for the other car object which was created as well as the two BillingAddress objects and the resource.
Did anything else change in the code?
Yes, declarations were added for each of the variables which have now been included as field definitions accessible to the class methods.
The following snapshots highlight the process and results.
JAVA Refactoring of the Local Fields


Creating the Test Method
Now we start creating the four test methods: addCar(), removeCar(), addBillingAddress(), and removeBillingAddress()
Start with the addCar() method. with the access method of public:
public void addCar();
Next we call the method to initialize our list with the call to populateArrays()method.
populateArrays();
We then test that the number of objects in the car list is zero:
// test that we started from an empty array
assertEquals(0, getCar().size());
We add the cars to the list using the not as yet created addCar() method.
// add cars to the list
crr1.addCar(c1);
crr1.addCar(c2);
Next we add assert methods to check that the size of the list correctly reflects the added cars:
assertEquals(2,crr1.getCar().size());
We check the correctness of the index of each of the cars. Note that lists are indexed starting at 0 and not 1.
assertEquals(0,getCar().indexOf(c1));
assertEquals(1,getCar().indexOf(c2));
Now we test (our yet to be created removeCar() method).
removeCar(c1);
Now check the array list size with the assert statement.
assertEquals(1,crr1.getCar().size());
We check that the index of what was the second car, which has now become the only (and first) car in the list should now be 0.
assertEquals(0,getCar().indexOf(c2));
We remove the remaining car in the list and check that the size of the list is 0:.
crr1.removeCar(c2);
assertEquals(0,crr1.getCar().size());
We use ECLIPSE “quick fix” to add both the addCar()and removeCar to source resource program.
Now in our source we write the two methods. They are both rather simple, since we are using built-in methods from the array class.
In the addCar() method we add the statement:
this.car.add(c1);
and in the removeCar() method we add the statement:
this.car.remove(c1).
Remember the use of the word this, it is a reference to the current object.
The billing address list is treated in a similar way. The code can be copied from the add methods replacing "car" with "billingAddress", "Car " with "car ", and change the prefixes of "c" with "ba" for the fields. The code for the calling methods and test methods appear in the shapshots below.
The Coded Methods for this Tutorial
 Test Method, actually does both first adds and then removes the cars.")
 Method mirrors the actions of the addCar() Method. It acts upon billing addresses.")

A Final Step, Run the Test
Finally, if all has gone well, the JUnit test should pass. If you have problems or issues please send a comment and I'll try to help.
A Recap of the Tutorial and What's Next
In this tutorial we created the methods to manipulate lists in JAVA. Appropriate test cases were added.
The assertTrue() method was introduced. This is a Boolean method which evaluates to true or false. The operator used in this method is the instanceof which compares the type of an object with the class type.
The term refractor was introduced. Refactor has a number of uses. In our example we used to to generalize fields, transforming them from local variables to class fields.
Finally, we used previous hints about color and statement hints to avoid a problem and suggested that frequent saving and testing of code changes is really essential. The hint about using "quick fix" for repetitive error corrections may seem an overkill but it can prevent coding errors and typos.
In the next tutorial we will create a number of methods:
checkoutCar(), checkinCar() - cars are rented and returned. Methods to associate a car with a company rental must be kept up to date.
getAvailableCars(),- we must know what cars are available for rental. Having a handy list let's both the rental agency and the potential customer know what their options are.
getUnavalibleCars(),- cars may be unavailable for reasons other than their rental (e.g. repair, servicing)
getCarsForBillingAddress() - for the billing department (and other uses) there is a need to know what cars are rented to what company.
Well that's all!


